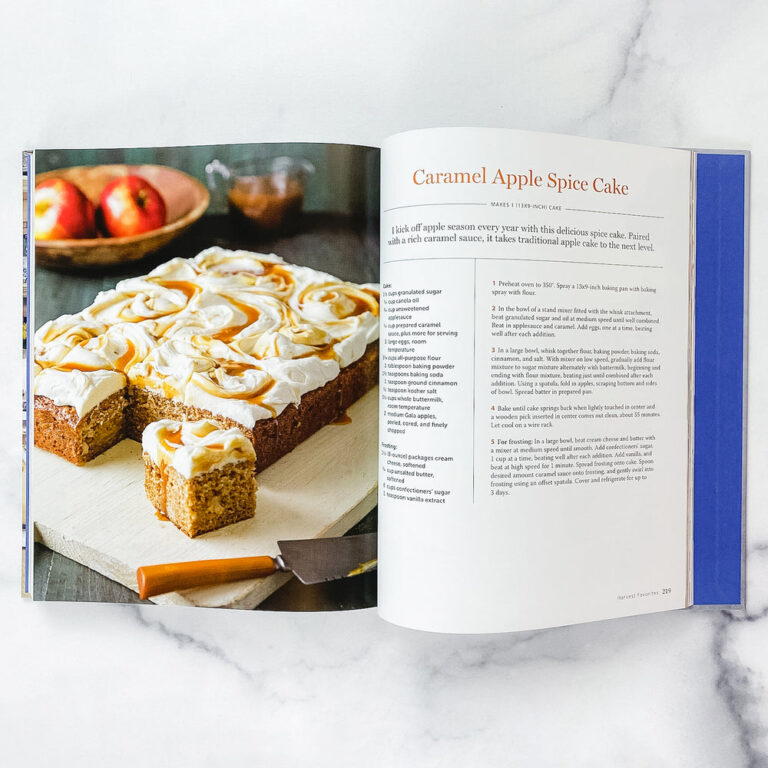
Refrigerator Yeast Bread Recipes: Easy and Delicious Homemade Loaves
Bread baking is an age-old tradition. Refrigerator yeast bread recipes make it even easier.
These recipes let you enjoy fresh bread without the usual hassle. Imagine mixing dough and letting it rise in the fridge. The next day, you shape and bake it. Refrigerator yeast bread recipes are great for busy schedules. You can prepare the dough ahead of time.
This method saves time and reduces stress. Plus, the slow rise in the fridge enhances flavor. The result is delicious, homemade bread. Whether you’re a beginner or an expert, these recipes fit your needs. Get ready to explore the world of refrigerator yeast bread. It’s fun, simple, and rewarding. Enjoy the warm, fresh bread with minimal effort.
Introduction To Refrigerator Yeast Bread
Refrigerator yeast bread is a unique and convenient way to bake bread. This method allows the dough to rise slowly in the refrigerator. This slow rise develops a deep, rich flavor. It’s perfect for busy schedules. You can prepare the dough in advance and bake it later.
Benefits Of Refrigerator Yeast Bread
Refrigerator yeast bread offers several advantages:
- Convenience: Prepare the dough ahead of time and bake when ready.
- Flavor: Slow fermentation enhances the bread’s taste.
- Texture: The bread has a chewy and airy texture.
- Flexibility: Suitable for different types of bread recipes.
Key Ingredients
To make refrigerator yeast bread, you will need the following ingredients:
| Ingredient | Quantity |
|---|---|
| All-purpose flour | 4 cups |
| Active dry yeast | 1 packet (7g) |
| Sugar | 2 tablespoons |
| Salt | 1 teaspoon |
| Warm water | 1 1/2 cups |
| Olive oil | 2 tablespoons |
These ingredients are easy to find and inexpensive. You probably have most of them at home. The recipe is simple, and the results are delicious.
Credit: redstaryeast.com
Essential Tools And Equipment
Creating delicious refrigerator yeast bread recipes starts with the right tools. Having the right equipment ensures your bread turns out perfect every time. This section will guide you through the essential tools and equipment needed for baking refrigerator yeast bread.
Must-have Baking Tools
To bake refrigerator yeast bread, you need a few basic tools. Here is a list of must-have items for your baking kit:
- Mixing Bowls: Different sizes for mixing and proofing dough.
- Measuring Cups and Spoons: Accurate measurements are crucial.
- Wooden Spoon or Silicone Spatula: For mixing ingredients.
- Stand Mixer with Dough Hook: Optional but helpful for kneading.
- Bench Scraper: Handy for cutting and handling dough.
- Baking Sheets or Pans: For baking the bread.
- Plastic Wrap or Damp Cloth: To cover dough while it rises.
- Thermometer: Ensures the right temperature for yeast activation.
Choosing The Right Refrigerator
The refrigerator plays a critical role in yeast bread recipes. It slows down the fermentation process, which enhances the flavor and texture of the bread. Here are some tips for choosing the right refrigerator:
- Temperature Control: The refrigerator should maintain a consistent temperature between 37°F and 40°F.
- Space: Ensure there is enough space for your dough to rise without being squished.
- Shelving: Adjustable shelves can accommodate different sizes of containers.
A table can summarize the essential tools and their uses:
| Tool | Use |
|---|---|
| Mixing Bowls | Mixing and proofing dough |
| Measuring Cups and Spoons | Accurate ingredient measurement |
| Wooden Spoon or Silicone Spatula | Mixing ingredients |
| Stand Mixer with Dough Hook | Kneading dough |
| Bench Scraper | Handling and cutting dough |
| Baking Sheets or Pans | Baking the bread |
| Plastic Wrap or Damp Cloth | Covering dough while rising |
| Thermometer | Checking dough temperature |
Equipping your kitchen with these tools will set you up for success. Happy baking!
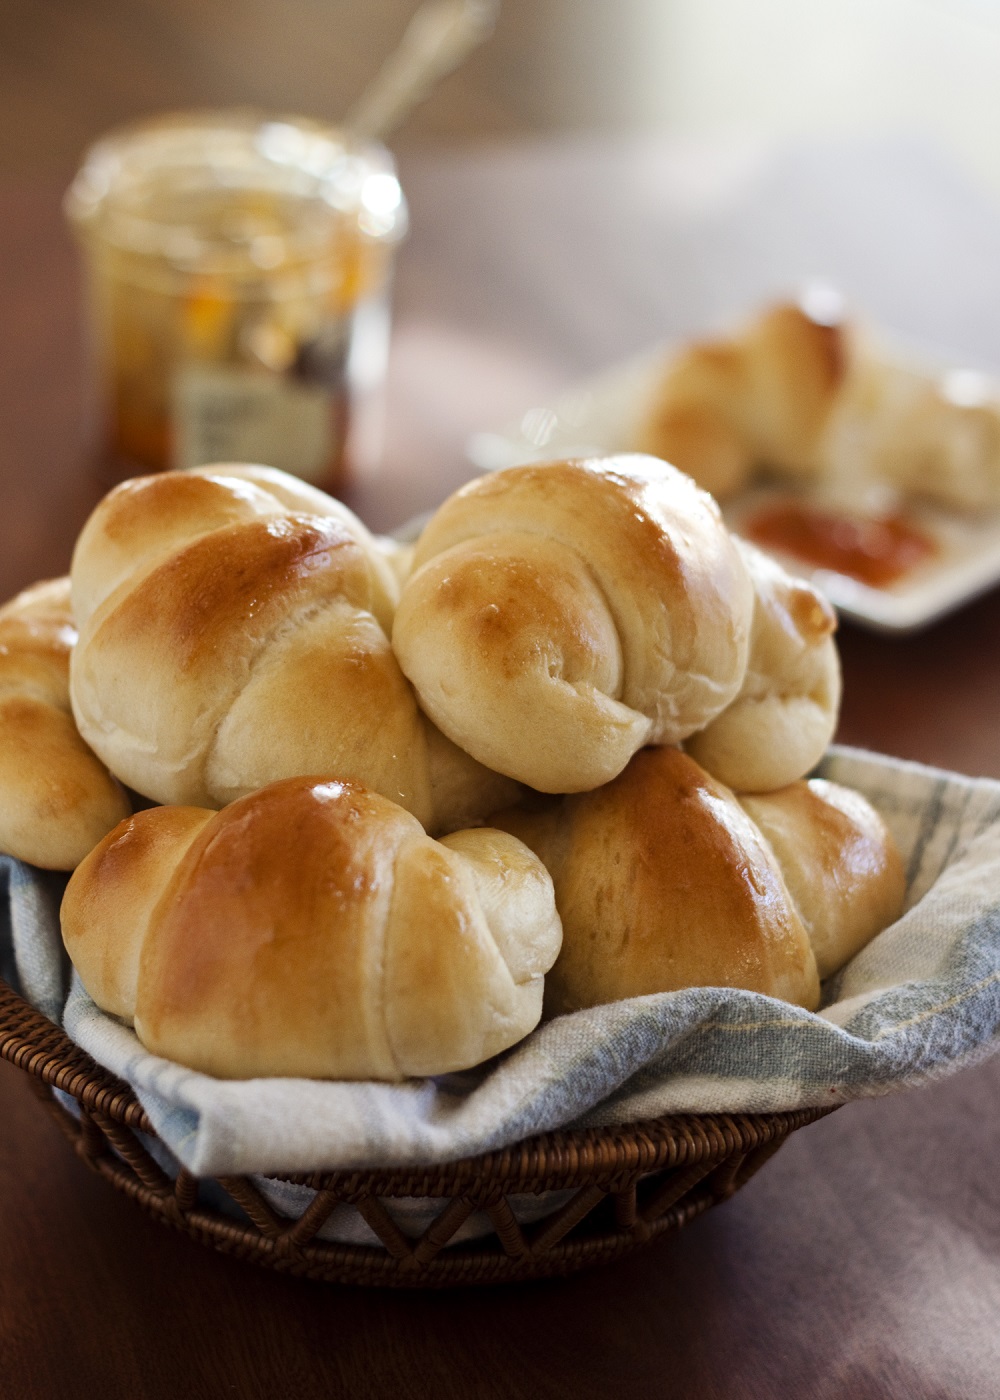
Basic Refrigerator Yeast Bread Recipe
Making bread from scratch can be easy and fun. With this basic refrigerator yeast bread recipe, you can enjoy fresh bread anytime. The dough can be kept in the fridge for up to three days, letting you bake fresh bread whenever you want.
Step-by-step Instructions
- Gather Your Ingredients: You will need flour, yeast, sugar, salt, and water. Make sure to use fresh yeast for the best results.
- Mix the Dry Ingredients: In a large bowl, combine 4 cups of flour, 1 packet of yeast, 1 tablespoon of sugar, and 2 teaspoons of salt.
- Add Water: Slowly add 1.5 cups of warm water (110°F/45°C) to the dry ingredients. Stir until a dough forms.
- Knead the Dough: Place the dough on a floured surface. Knead for about 10 minutes until smooth and elastic.
- First Rise: Place the dough in a greased bowl. Cover with a damp cloth. Let it rise in a warm place for about 1 hour, or until doubled in size.
- Refrigerate the Dough: Punch down the dough. Transfer it to a clean bowl. Cover tightly with plastic wrap. Refrigerate for at least 2 hours or up to 3 days.
- Shape and Bake: When ready to bake, shape the dough into a loaf. Place it in a greased loaf pan. Let it rise again until doubled, about 1 hour. Preheat your oven to 375°F (190°C). Bake for 25-30 minutes, or until golden brown.
Tips For Perfect Dough
- Use Fresh Yeast: Fresh yeast ensures a good rise and a light, fluffy texture.
- Check Water Temperature: Water should be warm but not hot. Hot water can kill the yeast.
- Knead Well: Kneading develops the gluten, giving your bread structure and chew.
- Let It Rise Properly: Allow the dough to rise until doubled in size. This step is crucial for a light loaf.
- Refrigerate Correctly: Cover the dough tightly to prevent it from drying out. Refrigeration slows the fermentation process, enhancing the flavor.
| Ingredient | Amount |
|---|---|
| Flour | 4 cups |
| Yeast | 1 packet |
| Sugar | 1 tablespoon |
| Salt | 2 teaspoons |
| Water | 1.5 cups |
Flavor Variations
Exploring different flavor variations can elevate your refrigerator yeast bread recipes to a new level. By adding unique ingredients, you can create delightful sweet or savory bread that will please any palate. Let’s dive into some exciting variations.
Sweet Bread Variations
Sweet bread offers a delightful treat for breakfast or dessert. Here are some ideas:
- Cinnamon Raisin Bread: Add cinnamon and raisins to your dough. The result is a sweet, spicy loaf.
- Chocolate Chip Bread: Fold in chocolate chips. It creates a dessert-like treat.
- Banana Nut Bread: Incorporate mashed bananas and chopped nuts. This adds a lovely texture and flavor.
| Sweet Bread | Key Ingredients |
|---|---|
| Cinnamon Raisin | Cinnamon, Raisins |
| Chocolate Chip | Chocolate Chips |
| Banana Nut | Mashed Bananas, Chopped Nuts |
Savory Bread Ideas
Savory bread pairs well with meals or as a snack. Consider these variations:
- Garlic Herb Bread: Mix in minced garlic and dried herbs. It enhances the flavor profile.
- Cheddar Jalapeño Bread: Add shredded cheddar and chopped jalapeños. This adds a spicy kick.
- Olive Rosemary Bread: Incorporate chopped olives and fresh rosemary. It gives a Mediterranean touch.
| Savory Bread | Key Ingredients |
|---|---|
| Garlic Herb | Minced Garlic, Dried Herbs |
| Cheddar Jalapeño | Shredded Cheddar, Chopped Jalapeños |
| Olive Rosemary | Chopped Olives, Fresh Rosemary |
Advanced Techniques
Refrigerator yeast bread recipes offer a convenient way to make delicious bread. These recipes save time and yield great results. To take your bread to the next level, try some advanced techniques. These methods will enhance the flavor, texture, and nutrition of your bread.
Incorporating Whole Grains
Whole grains add flavor and nutrition to your bread. Start by replacing a portion of the white flour with whole grain flour. You can use whole wheat, spelt, or rye. These grains bring a nutty taste and a hearty texture. Remember, whole grain flour absorbs more water. Adjust your liquid ingredients accordingly. This step ensures your dough remains moist and pliable.
Mix the whole grain flour with the white flour before adding it to the wet ingredients. This method helps in even distribution. Whole grains can make the dough denser. To counter this, allow extra rising time. Patience is key. Your efforts will result in a wholesome and flavorful loaf.
Using Sourdough Starter
Sourdough starter adds a unique flavor and extends the shelf life of your bread. You can make your own starter or buy one. To use it, replace a portion of the yeast with the sourdough starter. This change brings a tangy taste and a chewy texture.
Mix the starter with the water first. This step ensures it is evenly distributed. Then, proceed with the rest of the ingredients. Sourdough takes longer to rise. Plan for longer fermentation times. This slow rise develops complex flavors. Your patience will be rewarded with a rich and aromatic loaf.
These advanced techniques will elevate your refrigerator yeast bread. Experiment with whole grains and sourdough starter. Enjoy the delightful results.
Troubleshooting Common Issues
Making refrigerator yeast bread can be rewarding but sometimes issues arise. Dense loaves and overproofing are common problems. Let’s explore solutions to these issues.
Fixing Dense Loaves
Dense loaves can be frustrating. Here are some tips to fix this problem:
- Check the Yeast: Ensure your yeast is fresh. Expired yeast won’t rise well.
- Kneading: Knead the dough properly. Under-kneading leads to dense bread.
- Flour Amount: Use the right amount of flour. Too much makes the dough heavy.
If your loaves are still dense, try increasing the proofing time. The dough needs time to rise.
Preventing Overproofing
Overproofing can ruin the texture of your bread. Here are some steps to prevent it:
- Watch the Time: Keep track of proofing time. Don’t exceed the recommended duration.
- Temperature: Proof in a cooler place. Warm environments speed up the process.
- Visual Cues: Look for the dough to double in size. This is a good indicator.
If you do overproof, reshape the dough and proof again for a shorter time.
Storing And Preserving Bread
Properly storing and preserving bread is essential to maintaining its freshness and flavor. Learning how to store your homemade refrigerator yeast bread can help extend its shelf life. This prevents waste and ensures you enjoy delicious bread for longer.
Best Storage Practices
To keep your bread fresh, store it at room temperature in a cool, dry place. Use a bread box or a paper bag. This allows the bread to breathe and prevents mold. Avoid plastic bags, as they trap moisture, making the bread soggy.
- Store bread in a bread box or paper bag.
- Keep in a cool, dry place.
- Avoid plastic bags to prevent moisture buildup.
Freezing Tips
Freezing bread is a great way to preserve its freshness for a longer period. Follow these tips for the best results:
- Let the bread cool completely before freezing.
- Wrap the bread tightly in plastic wrap or aluminum foil.
- Place the wrapped bread in a freezer bag to prevent freezer burn.
When you’re ready to eat, thaw the bread at room temperature. For a fresh-from-the-oven taste, warm it in the oven for a few minutes.
| Step | Action |
|---|---|
| 1 | Cool bread completely. |
| 2 | Wrap tightly in plastic or foil. |
| 3 | Place in a freezer bag. |
| 4 | Thaw at room temperature. |
| 5 | Warm in the oven, if desired. |
By following these simple steps, you can enjoy your homemade refrigerator yeast bread fresh for weeks.

Credit: www.homemadeinterest.com
Serving Suggestions
Refrigerator yeast bread is incredibly versatile. Its subtle flavor and chewy texture make it perfect for a variety of meals and snacks. Here are some delicious serving suggestions to make the most of your homemade bread.
Pairing With Meals
Refrigerator yeast bread complements many dishes. Serve it with soups, stews, or salads for a hearty meal. The bread’s crusty exterior is great for dipping into broths and sauces. Try these pairings:
- Tomato Soup: The bread’s soft inside soaks up the rich soup.
- Beef Stew: Perfect for mopping up the savory gravy.
- Caesar Salad: Adds a crunchy contrast to the crisp lettuce.
Making Sandwiches
Use refrigerator yeast bread to elevate your sandwiches. Its firm texture holds up well to various fillings. Here are some sandwich ideas:
| Type | Ingredients |
|---|---|
| Classic BLT | Bacon, lettuce, tomato, mayonnaise |
| Grilled Cheese | Cheddar cheese, butter |
| Turkey Avocado | Turkey, avocado, lettuce, tomato, mustard |
These sandwiches are not only delicious but also easy to make. The bread’s homemade flavor adds a special touch.
Conclusion And Final Tips
Explore the joys of making refrigerator yeast bread at home. Enjoy fresh, delicious bread with minimal effort. Experiment with different recipes to find your favorite.
Baking bread with yeast is rewarding. Using the refrigerator method makes it easier. This technique allows for a slow rise, enhancing flavor. It’s perfect for busy schedules. Here, we’ll wrap up with key points and final tips.Recap Of Key Points
Refrigerator yeast bread is simple. Mix the dough, let it rise in the fridge. This method saves time. It adds flavor to the bread. You can bake fresh bread anytime. Use basic ingredients: flour, water, yeast, and salt. No need for special equipment. Patience is the key. Let the dough rise slowly. This improves texture and taste.Encouragement To Experiment
Don’t stick to one recipe. Try different flours. Add seeds or herbs. Experiment with shapes and sizes. Make rolls or loaves. Adjust the rising time. Find what works for you. Share your creations with friends. Enjoy the process of baking. Have fun with your bread experiments. Happy baking! “`
Credit: afewshortcuts.com
Frequently Asked Questions
What Is Refrigerator Yeast Bread?
Refrigerator yeast bread is dough that can be refrigerated before baking. This process allows the dough to ferment slowly, enhancing flavor.
How Long Can You Refrigerate Yeast Bread Dough?
You can refrigerate yeast bread dough for up to 72 hours. This extended time improves the dough’s flavor and texture.
Can You Bake Yeast Bread Straight From The Fridge?
Yes, you can bake yeast bread straight from the fridge. Allow the dough to come to room temperature before baking.
Why Refrigerate Yeast Bread Dough?
Refrigerating yeast bread dough slows fermentation. This enhances flavor, improves texture, and makes the dough easier to handle.
Conclusion
Creating delicious yeast bread with a refrigerator method is simple. The process saves time and effort. Perfect for busy days. The dough rests in the fridge, enhancing the flavor. You can enjoy fresh bread anytime. Try these recipes and taste the difference.
Enjoy baking with ease and convenience. Happy baking!